System Settings
Configure system settings in the EZ-Console admin interface.
Overview
System Settings allows you to configure various aspects of your EZ-Console application, including security policies, email configuration, OAuth/LDAP integration, and AI models.
Accessing System Settings
Navigate to: System → Settings
Settings Categories
Security Settings
Configure security policies and authentication:
-
Password Policies
- Minimum password length
- Password complexity requirements
- Password expiration
- Password history
-
Session Management
- Session timeout
- Maximum concurrent sessions
- Session auto-renewal
-
Multi-Factor Authentication
- MFA enforcement
- TOTP settings
- Email MFA
-
Account Security
- Account lockout threshold
- Account lockout duration
- Inactive account handling
Email & SMTP
Configure email sending:
- Go to Email & SMTP tab
- Enter SMTP server details:
- Host
- Port
- Username
- Password
- From email
- From name
- Click Test Connection
- Click Save
Common Providers:
- Gmail
- Outlook/Office 365
- SendGrid
- Amazon SES
- Custom SMTP
OAuth2.0 Authentication
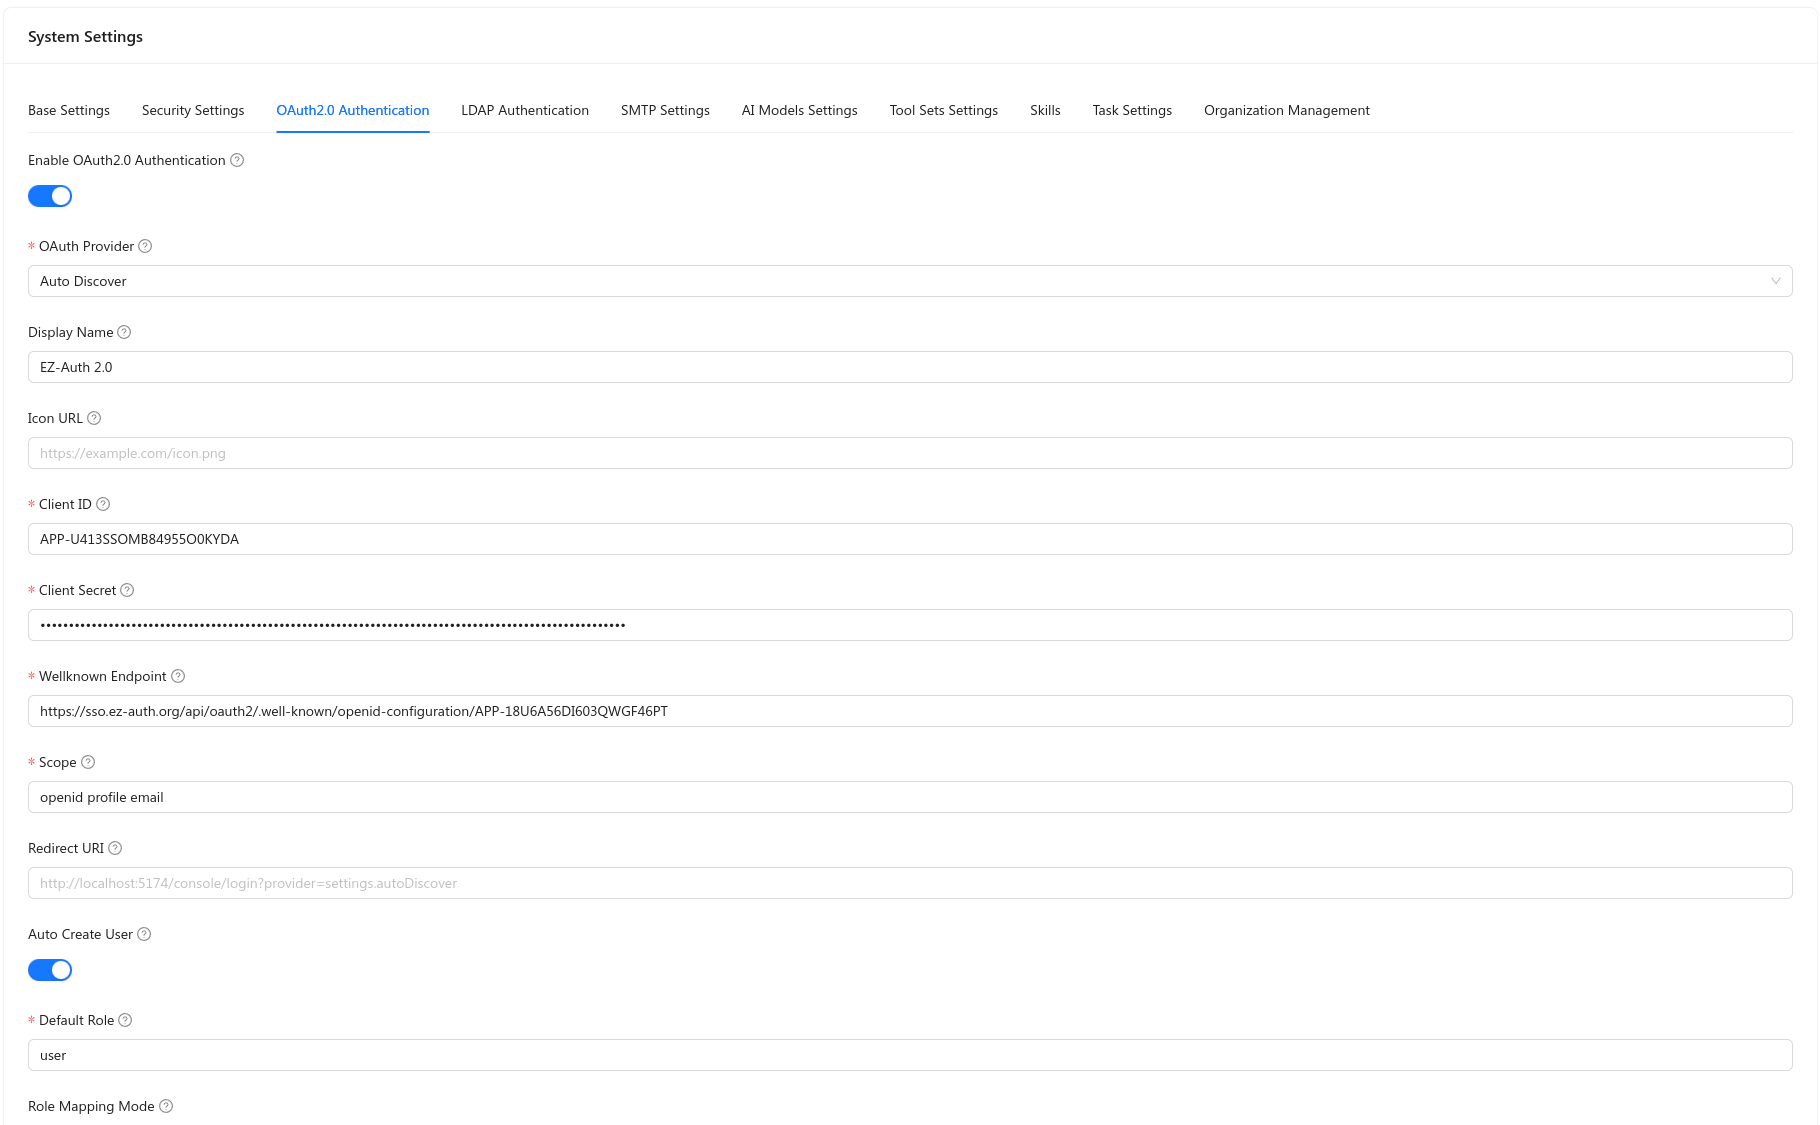
OAuth2/OIDC can also be defined in config.yml; the OAuth2.0 Authentication tab is the second supported place (see OAuth & LDAP Integration).
- Go to System → Settings and open OAuth2.0 Authentication.
- Enable OAuth2.0 Authentication.
- Choose OAuth Provider (including Auto Discover for OIDC discovery), set Client ID, Client Secret, Well-known endpoint and Scope as required by your IdP.
- Register the Redirect URI shown in the form with your identity provider.
- Set Auto Create User, Default Role, and Role Mapping Mode if your process requires them.
- Click Save.
LDAP Authentication
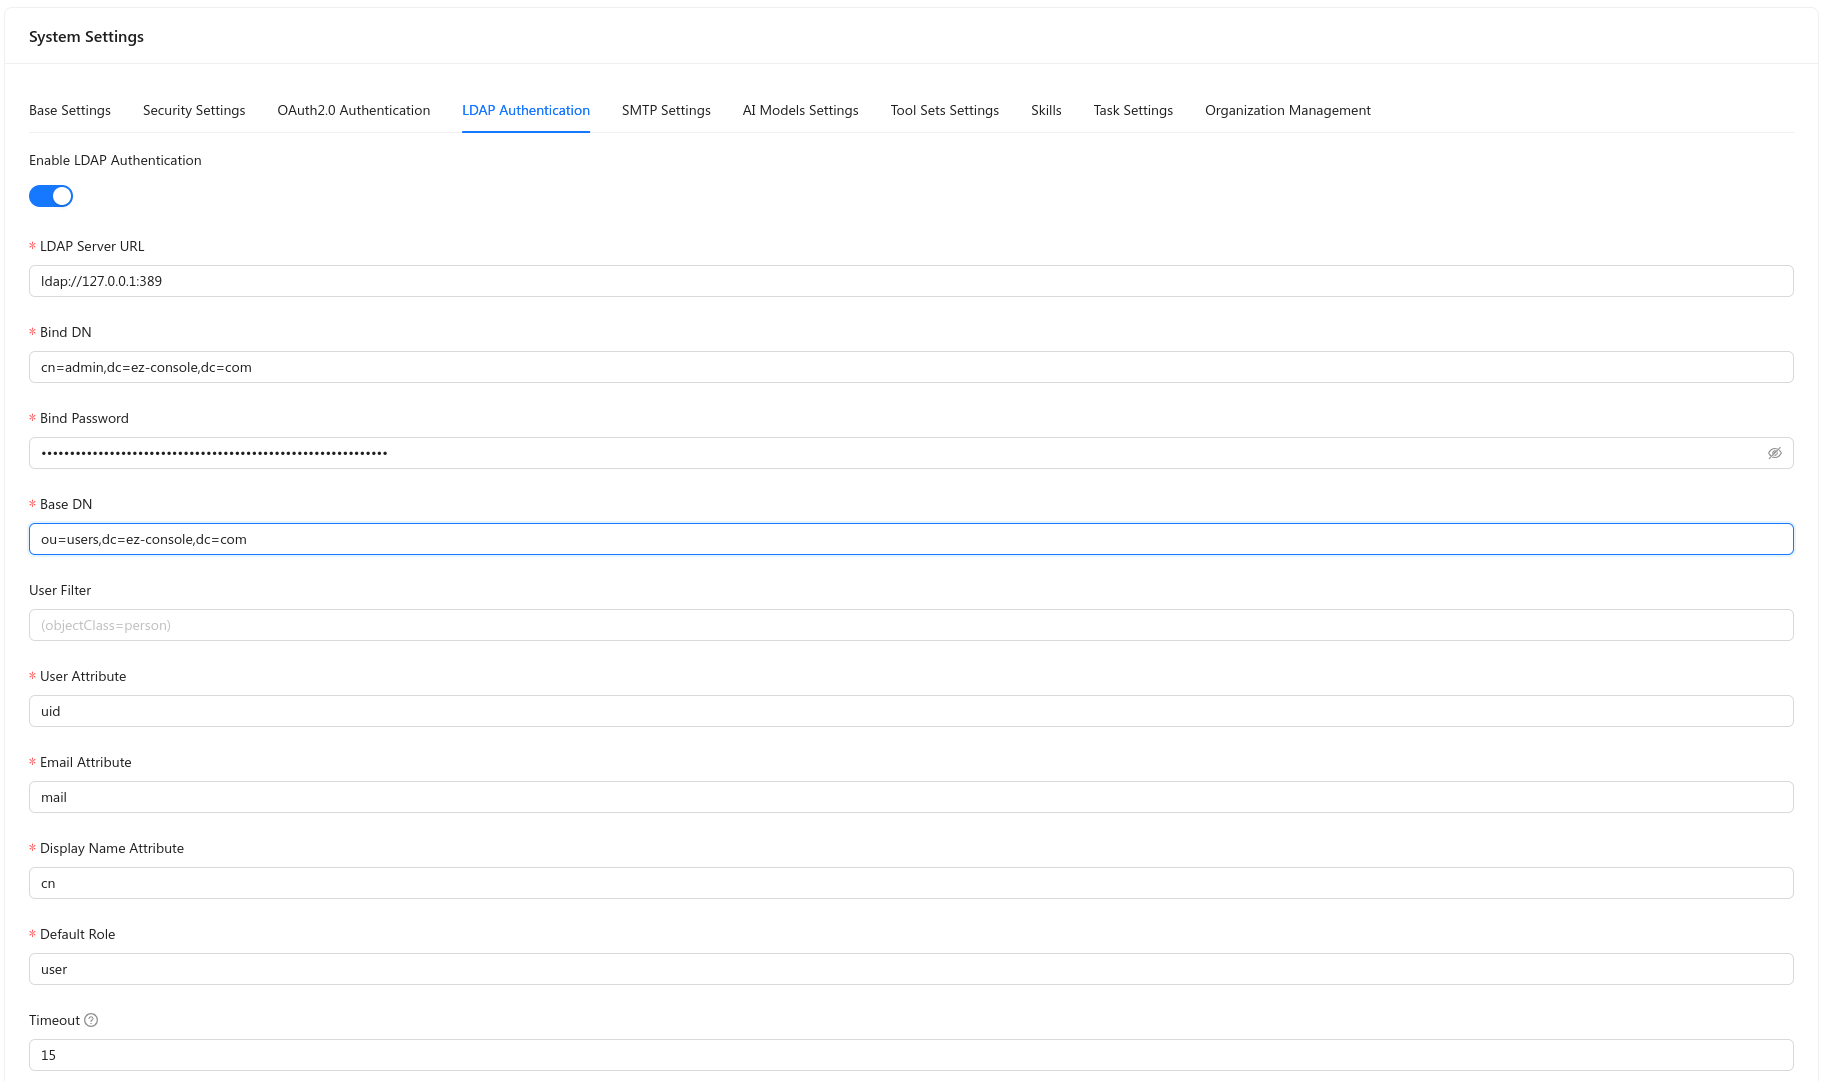
LDAP is configured only here (not via config.yml for operators).
- Go to System → Settings and open LDAP Authentication.
- Enable Enable LDAP Authentication.
- Enter LDAP Server URL, Bind DN, Bind Password, Base DN, optional User Filter, and attribute mapping (User Attribute, Email Attribute, Display Name Attribute), plus Default Role and Timeout.
- Use Test Connection when available, then Save.
AI Models
Configure AI model providers:
- Go to AI Models tab
- Click Create AI Model
- Configure:
- Name and description
- Provider (OpenAI, custom)
- API credentials
- Model settings
- Set as default (optional)
- Click Save
Toolsets
Configure AI toolsets:
- Go to Toolsets tab
- View available toolsets
- Enable/disable toolsets
- Configure toolset settings
Organization Settings
Multi-tenant organization settings:
- Go to Organizations tab
- View organization list
- Create/edit organizations
- Configure organization-specific settings
Updating Settings
Via UI
- Navigate to System → Settings
- Select the appropriate tab
- Modify settings
- Click Save
- Changes take effect immediately
Via API
PUT /api/system/settings
Content-Type: application/json
Authorization: Bearer <token>

{
  "password_min_length": "12",
  "session_idle_timeout_minutes": "120",
  "mfa_enforced": "true"
}
Settings Validation
Test Connections
Before saving, test connections for:
- SMTP servers
- LDAP servers
- OAuth providers
- AI model APIs
Validation Errors
If validation fails:
- Check error messages
- Verify credentials
- Test network connectivity
- Review configuration format
Best Practices
1. Test Before Production
Always test settings in staging before applying to production.
2. Document Changes
Document any custom settings for future reference.
3. Regular Review
Regularly review and update settings:
- Security policies
- Email configuration
- OAuth providers
4. Backup Settings
Export or document settings before major changes.
Related Topics
- Admin Console Overview — Console navigation and first steps
- Security Settings — Security configuration (file/env reference)
- Email & SMTP — Email setup
- OAuth & LDAP Integration — External auth
Need help? Ask in GitHub Discussions.